
Just let me say, if anyone would have told me I would be posting a picture of my toes on the internet I would have considered them just a step away from the "loony bin". Well, call me "loony" because here goes.

For several months now, my dear DIL, Lialani has been giving me pedicures. She had noticed my complaints about my back and hip when I tried to do this for myself and after turning her help down many times, I finally gave in.
Is that not just the sweetest thing? I have always had trouble with ingrown nails (I know, more information than you need to know), but since she has been taking care of them they have been healthy and I think even pretty.
Just wanted to say thanks, Lialani for being such a dear DIL and for touching them up today so they would look nice for my trip to KY next week.
Okay, on to the Totes part of this post.
Several weeks ago, my friend Gail sent me a link to a post where they had used placemats from the Dollar Tree to make a tote. It was flat, had no pockets and didn't even have cute strapping. Very functional, but not very cute. I just can't not do cute so I saw something I could add a little to and make it even more functioal and cute.
I went to my first Dollar Tree while on our antiquing trip to Remnants of the Past. Then I have hit every one in my path since. I could make dozens of these. They are lined and I found them in an assortment of colors with stripes, plaids, (and some recently that Gail found with stars and stripes)
This is what you will need to make a Placemat Tote Bag.

3 placemats
2 1/2 yds of straping
General sewing supplies
Size 16 Denim needle for your machine
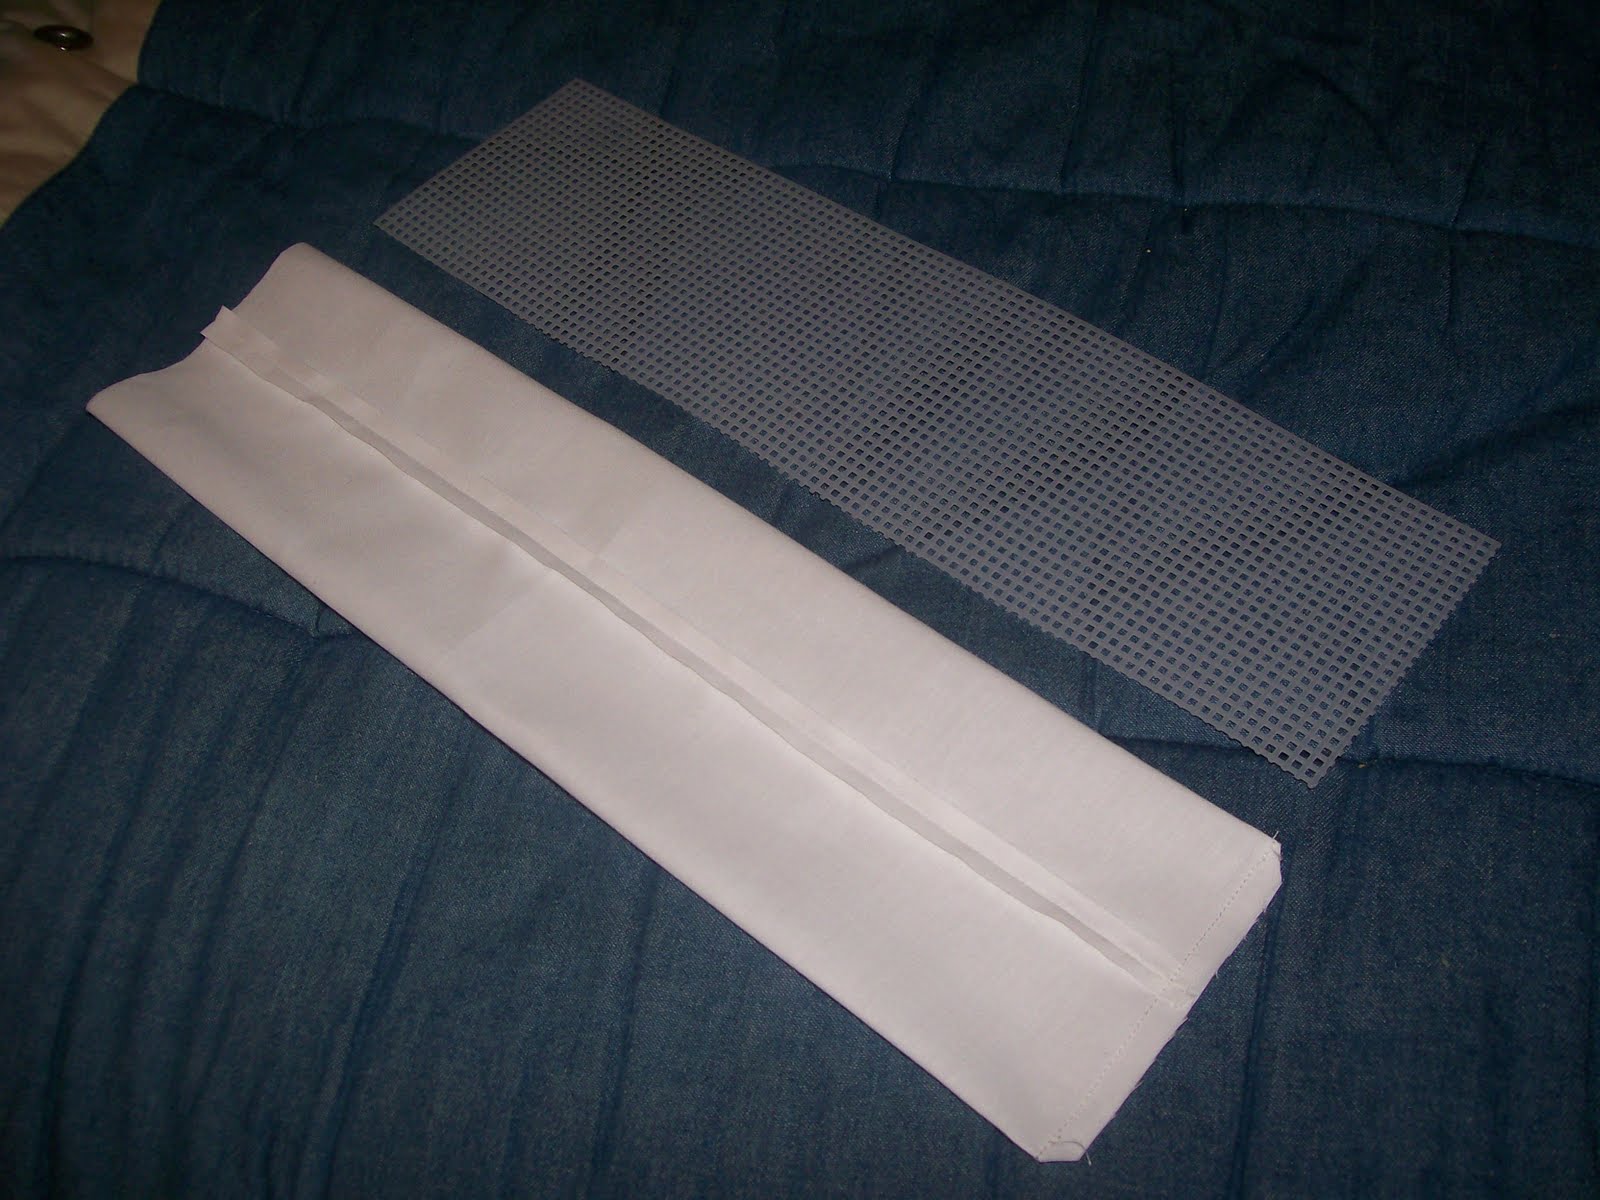
Plastic Canvas to stabilize bottom of tote (Used for crosstitch. I got mine at Walmart)
Scrap piece of white fabric to cover plastic canvas
This is the way I cut one of the place mats for pockets. The other two are used for the front and back and require no cutting.

The top two are 8 1/2 inches X 8 1/2 inches and are for the outside pockets. The bottom two are just what's left and I put them on the inside. The middle strip I used but didn't get a picture of what I did, so for now just set it aside. I cut these this way to take advantage of the hemmed part which will be the tops of the pockets.
The inside pockets have to be hemmed on two sides. Just turn under 1/4th inch and baste. They have to be sewn on first and placed in the middle and 4 inches from top of wrong side of placemat.

The top and one side already have a hem because of the way I had you cut them.
Now sew around the sides and bottom, leaving the top open to form a pocket.


Do this on the wrong side of both placemats. The stitching on the right side will be covered with the outside pockets and strapping.
On the right side of the placemat, the stripes run horizontal. The pocket stripes will be vertical. Place the pocket in the middle and all the way to the bottom of the placemat. The top and one side of the pocket will be hemmed and the raw edge will be at the bottom. Sew down both sides and across the bottom, leaving top open to form pocket. Repeat on the other placemat.

Cut the strap piece in half so you have two pieces 45" long
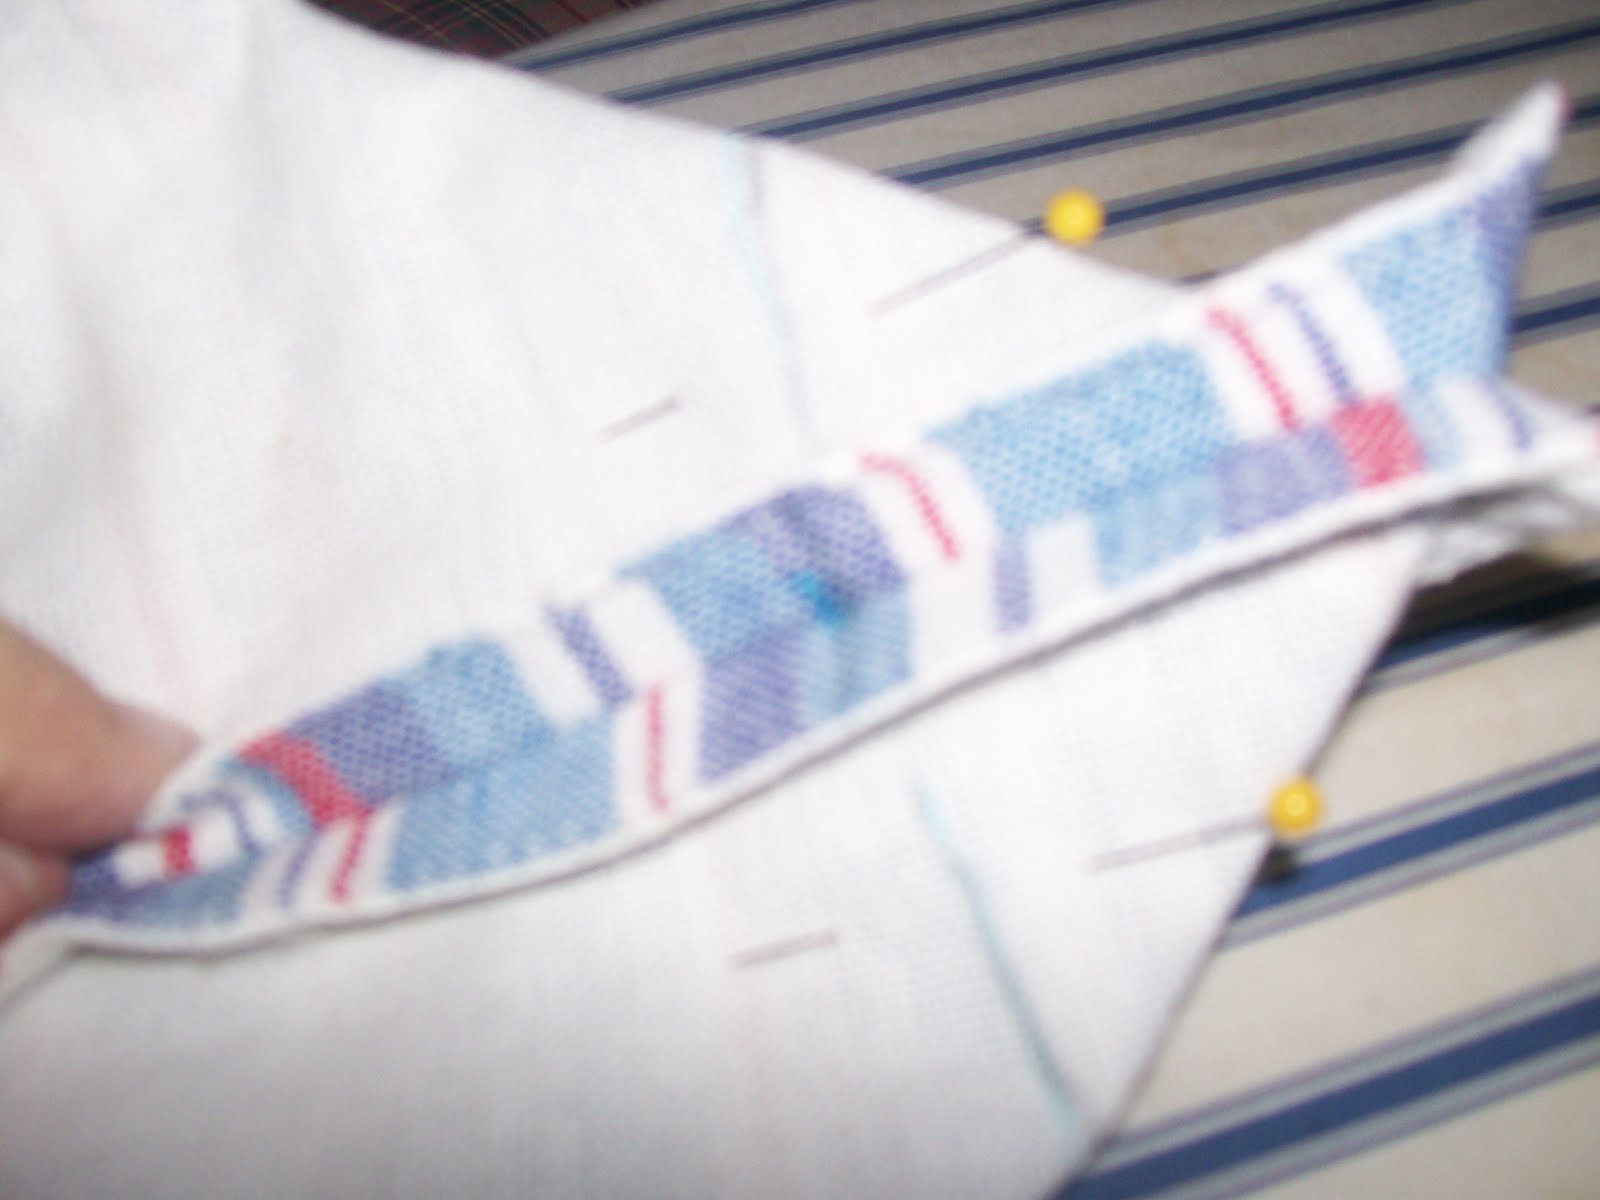
Place the strap over the pocket so it is half on the pocket and half on the placemat.

Pin the strap onto both sides of pocket and the placemat as shown below.

Sew down both sides of strap.

Sew across the top and backstitch back across to give extra stability.

This is what the inside and the outside should look like.

Place both placemats right sides together, pin, and sew around both sides and the bottom.

You could leave it like this and it is a flat tote. But I like to do one more step to give my tote a bottom.
This is a little hard to explain, but here goes. To shape a flat bottom, match bottom seam to side seam at the corner making a flat triangle. ( pull seams apart first) Mark a line 2" from the point. Pin and sew on line. Repeat for the other side.
This is what your tote should look like inside out, upside down (that reminds me of a Dr. Seuss book)

Measure the length and width of the bottom of your purse from the inside. That is the size you will cut the Plastic canvas. Cut a piece of white fabric the length and width plus 1/2" more each way. Sew a seam down the length, press open and sew accross bottom. Turn right side out and slip over plastic canvas piece. Slip stitch the top opening closed.
Turn your tote right side out, place your bottom in and you are finished.

Even though I taught sewing and quilting classes for years, this is the first time I have taught this way.
Please let me know here if you have a question. It might be a question someone else needs answered too. I apologize for some of the pictures, but I am still learning.
20 comments:
Hi Beverly, I love your toes, aren't you a lucky gal to have a DIL that can do this for you..she sounds very special!
Love the tote! Your directions seem very easy to understand.too cute!
hugs
Barb
Very nice! I never would have thought of plastic canvas for the bottoms but I have a ton of it from back in the day...I use a great product I got at Joann's that is fusible on both sides...It really cuts down on the amount of fabric you have to use. Thanks for sharing!
Oh my goodness! How cute and creative is this? and...love your toenails! :)
Very good instructions. I have the placemats too, I just need to get some straping and stabilizer plastic. Thank you.
Loved your toes too, what a sweet DIL.
Blessings,
Marcia
Very nice! I was never crazy about the placement bags either, but I could definitely use one like this. Cute toes, too :D
After all these years I never knew you had such cute toes. = )
Great tutorial Beverly. They are time consuming huh? Love your choice of placemat and your improvements to the project. Good job!
Cute as can be....both your toes and your bag (G)!!! XXX
Wow, have we come a long way with our blogging. I would have never guessed either one of us would allow ourselves to be pictured on the internet but we both did this week. Lialani is so sweet, she even takes care of your friends. I love your toenails, they look great. Now instead of having you make the project for me, you can say "the instructions are on my blog" lol Well, it is a great tutorial so maybe I will give it a try. Have fun on your trip.
Hi Beverly, I think you should join our pink Saturday group..you surely have pink around with all those sweet granddaughters! I know you have quilts, all kinds of pretties..I have to struggle each week to find my pinks, but you should join us...!!
hugs
Barb
This is very clever and I love the stripes....and the toes!
Love your toes, Beverly. How sweet of Lialani to fix you up! They look so pretty.
Your tutorial is super. Pictures are great and directions are so clear. But you know me -- I don't have a lot of patience around the sewing machine. ha! They do look great. You do an outstanding job.
Hugs,
Sally
I am definitely going to try this. Love it!
Wouldn't the fabric covering the plastic canvas need to be twice the width plus 1/2"?
Thanks.
You are so creative my friend! Hugs and blessings, Cindy
Hey Lady...Saw your post too on http://www.allfreesewing.com/Bags-and-Purses/Dollar-Store-Placemat-Tote-Bag/ml/1/?utm_source=ppl-newsletter&utm_medium=email&utm_campaign=allfreesewing20140611. WOW! You are famous! Hugs and blessings, Cindy
The fabric covering the plastic canvas need to be twice the width plus 1" (2 x 1/2").
Lovely, EASY project! Thank you for the step-by-step, Beverly!
Great placemat tote bag. So cute and creative. The instructions are really good and easy to follow. You did a great job. Thanks for sharing.
P.S.: Love your toes!
I stopped by from all free sewing. Love the tutorial. Great job. Looking forward to making one of these.
Hi,
I loved the tutorial. I have been looking for this type bag. You made it so clear, even I can follow it. I love the way you did not make the pictures so large it was hard to place when I copied the pattern. I use plastic canvas for bottoms too. I had never seen this use in all the patterns I have looked at. Perfect bottoms! Loved your site!
Pat
Love this tutorial. Could you tell me the size of the placemats you used? I would really like to try one of these. I love that it is already lined and looks sturdy too.
Post a Comment